
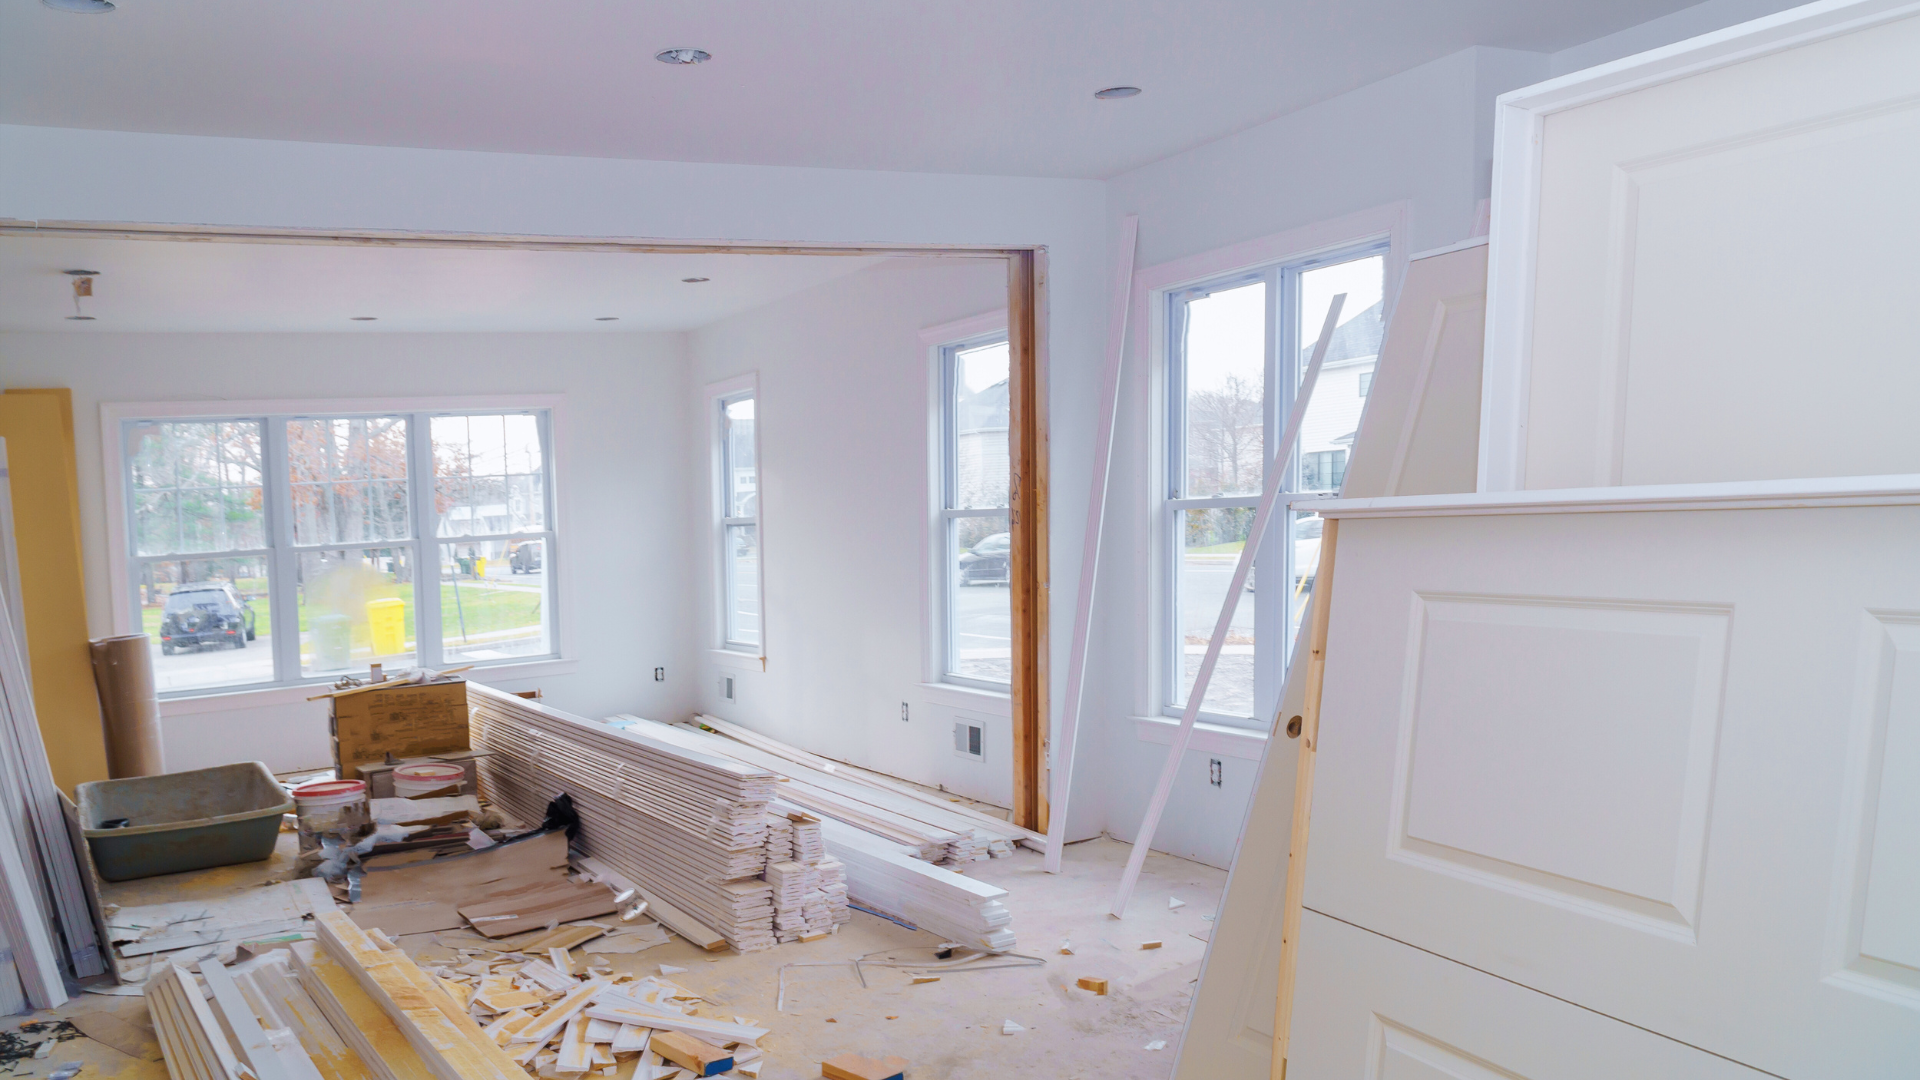
DIY vs Professional Renovation: Weighing Your Options for Home Improvement

Homeowners often face the critical decision of choosing between DIY projects and hiring professionals for renovations. The answer largely depends on the complexity of the project, available skills, and budget constraints. While DIY can save money and offer a sense of personal achievement, professional renovations may provide expertise and efficiency that DIYers often lack.

Understanding the scope of the renovation is essential. For simple tasks like painting or landscaping, homeowners may feel confident tackling the work themselves. Yet, for more complicated projects involving electrical or plumbing work, relying on professionals can ensure safety and compliance with local regulations.

Ultimately, weighing the pros and cons of both options can lead to a successful renovation experience. By considering both personal skills and project demands, homeowners can make informed decisions that align with their visions and resources.

Understanding DIY and Professional Renovation

Homeowners often weigh the benefits of DIY projects against the option of hiring professionals for renovations. Each approach has distinct characteristics, implications, and outcomes that can significantly affect the renovation experience.

Definition of DIY Renovations

DIY renovations involve homeowners taking on projects without the direct assistance of professional contractors. This might include tasks such as painting, installing flooring, or building furniture. Many homeowners engage in DIY projects to save on labor costs or to infuse personal creativity into their spaces.

The DIY approach requires a certain skill level. Some tasks can be completed with minimal tools and materials, while others may necessitate advanced knowledge and equipment. Homeowners should consider their abilities, budget, and time commitment when choosing this route.

Definition of Professional Renovations

Professional renovations entail hiring skilled contractors, such as general contractors or specialized tradespeople, to manage and complete renovation tasks. Professionals bring expertise, tools, and often, a network of resources for sourcing materials. This route can streamline the renovation process, reducing the time and stress involved.

Professional contractors are usually licensed and insured, which adds a layer of security for homeowners. They often provide detailed estimates and timelines, allowing for clearer project expectations. Engaging a professional may come with a higher cost, but it can ensure higher quality and adherence to regulations. Additionally, for special cases like homes that have experienced significant water intrusion or mold issues, professional services become essential. For homes facing such challenges, companies like Flood Emergency Services can provide invaluable emergency response, thorough cleanup, and effective drying to help restore properties quickly and safely.

Key Differences Between DIY and Professional Approaches

The primary distinctions between DIY and professional renovations largely revolve around skill, cost, and quality.

Cost: DIY projects typically incur lower labor costs but may require investment in tools and materials, whereas hiring professionals entails higher upfront costs but can prevent unexpected expenses.

Quality: Professionals usually guarantee a higher level of workmanship because of their experience. Conversely, homeowners may achieve satisfactory results in simpler projects, but mistakes can lead to costly repairs.

Time and effort: DIY work demands significant time and effort, often stretching longer than expected. Professional renovations often adhere to a timeline, allowing homeowners to return to their lives more quickly.

Deciding between DIY and hiring professionals involves considering personal skill sets, budget constraints, and project complexity. Homeowners should evaluate which approach aligns best with their renovation goals.

Evaluating Project Scope and Suitability

Determining whether a renovation project is suitable for DIY or requires professional assistance involves evaluating the project’s complexity, required skills, and safety considerations. A clear understanding of these factors helps in making informed decisions.

Types of Renovation Projects for DIY

Certain renovation projects lend themselves well to DIY efforts. Tasks like painting, installing shelves, and updating fixtures are often manageable for individuals with basic skills. Bathroom and kitchen remodels can also be tackled, focusing on cosmetic changes like cabinet painting and tile installation. However, it is essential to avoid complex tasks requiring specialized knowledge.

Examples of projects not suited for DIY include structural repairs, major plumbing modifications, and extensive electrical work, where mistakes can lead to safety hazards.

When to Hire Professional Contractors

Some renovations are best left to the experts due to their complexity. Projects involving electrical wiring, plumbing, or structural changes typically necessitate professional oversight. Hiring a handyman or specialist may save time and prevent costly errors. This can be especially true when exploring renovation ideas for small homes, since limited space often requires creative design solutions and precise execution that professionals are better equipped to handle.

Additionally, when a renovation requires permits or compliance with local building codes, professionals ensure all regulations are met. Clients should consider their budget, timeline, and project scale when deciding to hire help. If a project significantly impacts the home’s structure or function, professional assistance is advisable.

Assessing Skill Levels and Safety Considerations

Before embarking on any renovation, individuals should assess their skills realistically. Tasks like light carpentry or basic electrical fixes may be within reach for those with experience. Conversely, newcomers should approach intricate jobs with caution.

Safety is paramount; understanding potential hazards related to plumbing or electrical work is essential. For complex projects, seeking professional help minimizes risk. Taking a comprehensive inventory of required tools and materials can also guide the decision-making process for DIY or professional engagement.

Cost, Quality, and Impact on Home Value

When considering renovation options, costs, quality of work, and the potential impact on home value are crucial factors. DIY projects may save money, but the quality and long-term value need careful evaluation.

Comparing Renovation Costs

DIY renovation costs typically include materials and tools. For example, a bathroom renovation may cost around $5,000 to $15,000 if done professionally, while a DIY approach can lower costs significantly, sometimes to $3,000 or less. Labor expenses significantly contribute to overall average costs, often making professional work more expensive.

  • Estimated Costs for Common Renovations:
    • Bathroom Renovation (Professional): $10,000 – $15,000
    • Bathroom Renovation (DIY): $3,000 – $8,000
    • Kitchen Remodel (Professional): $20,000 – $50,000
    • Kitchen Remodel (DIY): $10,000 – $30,000

Homeowners must assess whether saving money upfront outweighs the risks of potential costly mistakes.

Quality and Longevity of Finished Work

Quality in renovations varies significantly between DIY and professional projects. Professionals bring experience and skill, ensuring high-quality finishes and adherence to building codes. For instance, a skilled contractor can achieve a seamless tile job or durable cabinetry, which may not be attainable through DIY efforts. This difference is especially noticeable in areas that require specialized materials or techniques, such as flooring solutions. In settings like garages, basements, or commercial spaces, professionals from reputable firms like Surface Pros Epoxy Flooring can help to achieve such a solid foundation floor that’s both beautiful and built to last.

DIY projects often result in variable quality. Homeowners with limited experience may face issues, such as improper installation or material choices. This could lead to repairs or lay the groundwork for future problems, thus affecting the longevity of the work.

Furthermore, material selection and customization play a crucial role in ensuring the durability and functionality of any renovation project. Professionals assist homeowners in choosing durable, high-quality materials and surfaces designed to withstand daily use.

Moreover, homeowners searching online for “bathroom cabinets near me” or “kitchen countertops near me” often rely on professional services to access high-quality materials and expert craftsmanship, resulting in bathrooms and homes that are both beautiful and built to last.

Effect on Property Value

Renovations can positively impact property value, but the returns depend on the type of renovation and its execution. Professional work generally influences home value more favorably due to better quality and perception.

For instance, well-executed bathroom renovations can increase a home’s value by approximately 70% to 80% of the cost. In contrast, poorly done DIY efforts may result in a decrease in home appeal, ultimately reducing property value.

  • Typical Return on Investment (ROI) for Renovations:
    • Kitchen Remodel (Professional): 70% – 80% ROI
    • Bathroom Remodel: 60% – 70% ROI
    • Living Area Improvements: 50% – 60% ROI

Ultimately, the choice between DIY and professional renovation must balance cost, quality, and value impact comprehensively.

Making the Best Choice for Your Home

Deciding between DIY renovations and hiring professionals requires careful thought. Key factors include planning, budget constraints, legal obligations, and personal skill sets. Understanding these aspects will aid homeowners in making informed choices.

Planning and Budgeting for Success

Effective planning is the cornerstone of any successful renovation project. Homeowners should start by clearly defining their goals, whether it’s a kitchen remodel or bathroom renovation. A detailed budget is essential. Create a list of expected costs, including materials, labor, and unexpected expenses. Allocating an additional 10-20% for surprises is wise.

Tools like budgeting apps or spreadsheets can help track expenses. Planning should also include a timeline, ensuring all parties understand project expectations and deadlines.

Legal and Permit Considerations

Before starting any renovation, homeowners must be aware of legal requirements and permits. Many projects, especially structural changes, require permits from local authorities. Failing to obtain necessary approvals can lead to fines or mandatory removal of work.

Research local regulations related to zoning, safety codes, and environmental guidelines. Websites or local offices can offer valuable information. Engaging with professionals often ensures compliance with these regulations if they are unsure.

Tips for Choosing Between DIY and Professional Renovations

When considering DIY versus professional help, assess personal skills and experience. Simple tasks like painting or landscaping may be suitable for DIY. Complex jobs, like plumbing or electrical work, typically require a qualified expert. Homeowners should also factor in time availability. DIY projects often take longer and can disrupt daily life. In contrast, professionals usually complete work efficiently.

Finally, consider the desired quality and finish. Professionals deliver a level of detail that might be challenging for DIYers, especially in high-visibility areas like kitchens or bathrooms. Balancing these elements will guide decisions effectively.


Why Sir Walter Grass Is a Top Choice for Home Lawns

Creating a perfect home lawn takes more than regular mowing and the occasional sprinkler run. It all starts with choosing the right grass. If you’re on a mission to transform your yard into a lush, green haven, you might have come across Sir Walter grass. But what makes it such a standout choice? Here, we’ll explore the benefits, care requirements, and unique qualities that make Sir Walter grass one of the top options for home lawns in Australia.


What is Sir Walter Grass?

Let’s start with a quick introduction. Sir Walter Buffalo grass is an Australian-bred turf variety, specifically developed to thrive in the diverse Australian climate. Unlike other turf types, Sir Walter grass Perth is known for its resilience, adaptability, and striking green colour, which it holds year-round with proper care. Its soft, broad leaves are not only easy on bare feet but also great for family-friendly spaces, as they’re gentle for kids and pets.


The Appeal of Sir Walter Grass: Why Homeowners Love It

Sir Walter’s popularity is no coincidence. There are some pretty specific reasons homeowners keep coming back to this grass:

  • Unmatched Durability – Sir Walter grass handles the ups and downs of Australia’s climate, from scorching summers to cool winters. It’s particularly drought-tolerant, making it ideal if you’re looking to conserve water without sacrificing lawn health.
  • Low Maintenance – Who doesn’t love a beautiful lawn without the constant upkeep? Sir Walter requires less fertiliser and only needs mowing around once a week in summer, making it ideal for those who prefer a low-maintenance lawn.
  • Shade Tolerance – Not every grass type can handle shady spots, but Sir Walter thrives in partial shade. With 60–70% shade tolerance, it’s perfect if your yard has large trees or shaded areas near buildings.
  • Self-Repairing Nature – Got patches? No problem. Sir Walter spreads sideways and quickly fills in bare spots, meaning it can recover on its own from regular wear and tear.
  • Pest and Disease Resistance – Thanks to its dense growth, Sir Walter naturally resists many pests and weeds. This characteristic helps reduce the need for harsh chemicals and keeps maintenance time to a minimum.

How to Plant Sir Walter Grass Successfully

Setting up a Sir Walter lawn doesn’t have to be complicated, but getting it right from the start ensures a thriving lawn later. Here’s what you need to know to plant and establish Sir Walter grass effectively.

  1. Preparation is Key: Clear the area of any debris, weeds, or old grass. A clean, level surface gives Sir Walter the best chance to establish roots and grow evenly.
  2. Soil Quality: Ensure your soil is loose and well-draining. Sir Walter can tolerate a range of soils but performs best in soil that’s been enriched with organic matter or a quality lawn starter mix.
  3. Lay Turf Properly: When you’re ready to lay the turf, avoid gaps by placing pieces tightly together. This will help prevent weeds from creeping in and allow for a uniform lawn appearance as the turf knits together.
  4. Water Wisely: After laying your turf, water it generously to help roots take hold. For the first couple of weeks, keep the soil moist but not waterlogged. Once established, Sir Walter requires only occasional watering, especially in summer.
  5. Initial Mowing: Give it a few weeks before the first mow. Once the grass feels well-rooted and firm, mow high to encourage deep roots and thicker growth. Then, continue with regular mowing to keep your lawn looking sharp and healthy.

Caring for Your Sir Walter Lawn: Tips for Long-Term Success

Once your lawn is established, keeping it healthy is relatively straightforward. Here’s a breakdown of the essential care steps for maintaining your Sir Walter grass:

  • Mowing: Sir Walter prefers to be mowed to a height of 2-5 cm. Mow weekly during the warmer months, but you can stretch it to every two weeks in winter when growth slows down.
  • Watering: Despite its drought resistance, Sir Walter appreciates a deep watering during prolonged dry periods. Aim for a soaking every 10–14 days in summer and adjust based on rainfall.
  • Fertilising: For best results, fertilise Sir Walter twice a year – once in spring and again in autumn. Use a slow-release fertiliser to encourage steady growth and maintain colour.
  • Aerating and Dethatching: Over time, Sir Walter can develop a layer of thatch (old, dead grass) that blocks air and water from reaching the roots. Aerate and dethatch your lawn every couple of years to promote healthy root development.

Common Myths About Sir Walter Grass – Cleared Up

As popular as it is, there are a few misconceptions about Sir Walter grass that deserve clarification:

“Sir Walter Needs Lots of Water” 

While it benefits from an occasional deep watering, Sir Walter actually uses less water than many other types. Its drought tolerance makes it a great choice for areas with water restrictions.

“It Can’t Handle Cold Weather” 

This is another common myth. Sir Walter is more cold-tolerant than people think and holds up well in Australian winters, retaining its green colour better than many other varieties.

“Sir Walter Attracts Pests” 

Its dense growth naturally limits pest issues, meaning fewer applications of pest control products are needed.

Why Sir Walter is Worth It

If you’re weighing up grass options, the unique qualities of Sir Walter make it worth the investment. It’s not just about appearances, either. Sir Walter offers both durability and flexibility, making it a practical choice whether your lawn is the centre of family activities or a space to relax. It’s the kind of grass that saves you time and water while keeping your lawn green and inviting. Its ability to thrive in challenging conditions and its minimal maintenance make it ideal for many Australian households.


Transform Your Lawn with Sir Walter

Sir Walter grass offers a combination of beauty, resilience, and ease of care that’s hard to beat. If you’re after a lawn that looks great, requires less work, and stands up to the elements, it’s hard to go past this choice. So, if you’re ready to enjoy a lush, low-maintenance lawn that adds both beauty and value to your home, Sir Walter might just be the answer you’ve been looking for.

How to Choose the Right Fence for Your Home: A Comprehensive Guide

Choosing the right fence for your home can be a bit of a balancing act. You want something that looks good, fits your budget, and serves its purpose. Whether you’re looking for more privacy, increased security, or simply enhancing your curb appeal, there’s a perfect fence out there for you.


What Do You Want the Fence to Do?

The first step in selecting the right fence is understanding what you need it for. Not all fences are built the same, and their functionality can vary widely. So, take a moment to ask yourself: What’s the primary purpose of this fence?

  1. Privacy: Are you looking to keep your backyard conversations private from nosy neighbors?
  2. Security: Do you want something sturdy enough to keep intruders out or pets and children in?
  3. Aesthetic appeal: Maybe you just want a fence that adds a stylish touch to your home’s exterior.
  4. Noise reduction: Some fences are designed to act as sound barriers, helping reduce noise pollution.
  5. Boundaries: Sometimes, a simple demarcation between properties is all that’s needed.

Knowing your main goal will help you narrow down your options significantly. For example, if privacy is one of your main objectives, Trex Fencing seclusions are definitely worth considering. Plus, they offer additional benefits too. So, really think about what you want to achieve and then consider your options.


Different Types of Fencing Materials

Once you know what you need the fence to accomplish, it’s time to consider the materials. Each type of material offers different benefits and drawbacks, so it’s essential to match the material to your needs.

1. Wood Fences

Wood is the classic choice when it comes to fencing. It’s versatile, offering options from rustic to modern designs. You can easily stain or paint wood fences to match your home’s aesthetic. However, wood does require maintenance-staining, painting, and sometimes even replacing boards after they wear out.

  • Pros: Warm and natural appearance, highly customizable.
  • Cons: Prone to rot, insect damage, and warping if not maintained.

2. Vinyl Fences

Vinyl fences have gained popularity for being low-maintenance. They don’t require staining or painting, and they are resistant to pests and rot. Plus, they come in a variety of styles that mimic the look of wood without all the upkeep.

  • Pros: Low maintenance, long-lasting, available in various styles.
  • Cons: Can be more expensive upfront than wood, fewer design options.

3. Aluminum Fences

If you’re looking for a sturdy, stylish, and low-maintenance option, aluminum fencing might be the way to go. It’s a great choice for decorative purposes or securing a pool area. While it doesn’t offer the same level of privacy as wood or vinyl, it excels in terms of security.

  • Pros: Low maintenance, durable, weather-resistant.
  • Cons: Not ideal for privacy, higher upfront cost.

4. Chain-Link Fences

Chain-link fences are highly functional and budget-friendly. They’re often used for keeping pets contained or securing larger areas like backyards. However, they’re not exactly known for their aesthetic appeal. While you can add slats for more privacy, they’re still primarily used for practicality over beauty.

  • Pros: Affordable, easy to install, durable.
  • Cons: Limited privacy and aesthetic appeal, not ideal for front yards.

5. Composite Fences

Composite fencing is made from a mixture of plastic and wood fibers, combining the benefits of both materials. It offers the look of wood without a high level of maintenance, and it’s incredibly durable. However, like vinyl, it can come with a higher price tag.

  • Pros: Low maintenance, wood-like appearance, durable.
  • Cons: Higher upfront cost, limited color options.

Considering Your Budget

When choosing the right fence, your budget will play a big role. The costs can vary based on the material, the size of the fence, and labor for installation. Here’s a rough breakdown:

  • Wood: Mid-range cost but requires maintenance over time, adding to the long-term expense.
  • Vinyl: Higher initial cost, but lower maintenance costs make it more affordable over time.
  • Aluminum: High upfront costs but very low maintenance costs.
  • Chain-link: Most affordable upfront, but less aesthetically pleasing.
  • Composite: On the expensive side, but low maintenance makes it cost-effective in the long run.

Take into account not only the initial purchase price but also the long-term costs of upkeep and repairs.

Height and Design: Don’t Forget to Check Local Regulations

Before you get too far into your decision-making process, you’ll want to check local building codes and homeowners’ association regulations (if applicable). Some areas have restrictions on the height and material of fences, particularly in front yards. Your ideal 6-foot privacy fence might not fly with your local council if there are height restrictions in place.

Also, consider how the design of the fence will complement your home. The right fence can enhance your home’s look, while the wrong one can clash and lower its appeal. After deciding on the material for your fence, you can contact fencing contractors ashford (or elsewhere) to ensure expert installation of durable, well-designed fencing.

Durability and Climate Considerations

Climate plays a big role in how well your fence will perform over time. If you live in an area with extreme weather, you’ll want to choose a material that can withstand the elements.

  • Wood fences can warp in humid climates or rot in areas with heavy rainfall.
  • Vinyl and composite fences hold up well in most climates but may become brittle in extremely cold temperatures.
  • Aluminum fences are rust-resistant, making them ideal for areas with lots of rain or humidity.

Choosing the right fence material for your climate will ensure you don’t have to deal with frequent repairs or replacements.

Installation: DIY or Hire a Pro?

Before moving forward, ask yourself whether you’re comfortable installing the fence yourself or if you’d prefer to hire a professional. Some fences, like chain-link, are easier to install on your own, while others-such as wood and vinyl-may require the expertise of a skilled Fence Builder to ensure they are properly and evenly set up.

Remember, if you’re leaning toward a DIY approach, make sure you have the right tools and enough time to get the job done. However, if you’re unsure or want to guarantee long-lasting results, hiring a professional might be worth the extra expense to ensure your fence stands strong for years to come.

Making the Right Choice

With all the different options available, choosing the right fence can feel overwhelming. But by considering your needs, budget, and local regulations, you’ll be well on your way to making the perfect choice. Take your time, weigh the pros and cons, and enjoy the transformation a new fence can bring to your home!

9 Signs Your Swimming Pool Pump Needs Immediate Repair

A swimming pool is a dream for many, especially when the weather heats up. But keeping that sparkling oasis running smoothly requires a bit of attention. One of the most essential components? The pool pump. It’s the heart of your pool system, circulating water to keep it clean and safe. But like any equipment, pool pumps can develop issues over time. The trick is catching those problems early before they become costly headaches.


1. Unusual Noises

One of the most obvious signs your pool pump is in trouble is a change in sound. If you notice your pump making grinding, screeching, or rattling noises, that’s not normal. Pumps should hum smoothly in the background. Loud, strange noises often point to issues with the motor or bearings. Ignoring these sounds could lead to more severe damage and expensive repairs, which is why you need to look for experts in pump repairs Perth sooner rather than later.


2. Reduced Water Flow

Have you noticed the water flow in your pool seems weaker than usual? A pool pump’s job is to circulate water through the system. If it’s not doing that effectively, it could indicate a blockage, clogged filter, or even an impeller problem. Reduced water flow is a sign that your pump isn’t working efficiently, which could affect the overall cleanliness of your pool.


3. Frequent Tripping of the Circuit Breaker

Does your circuit breaker keep tripping every time your pool pump is on? This is a definite red flag. It’s possible that the pump motor is overheating or drawing too much power. Electrical issues are not something to ignore, as they can lead to more significant problems or even pose safety risks. If you’re constantly resetting the breaker, it’s time to call in a professional to diagnose the problem.


4. Leaking Water

Water leaking from the pump is never a good sign. Pool pumps are designed to be watertight, so if you see puddles around the pump or notice drips, it could indicate a damaged seal, cracked housing, or even loose fittings. A leaking pump will not only waste water but can also lead to bigger issues if not addressed quickly. Get in contact with a Delmarva DE emergency plumber (or a plumber in your area) to take a look and administer a solution as soon as possible.


5. Air in the Pump Basket

When everything is working properly, the pump basket should be full of water. If you see air bubbles in the pump basket, or notice air being sucked into the system, this is a sign of a potential leak somewhere in the suction side of the pump. Air can cause the pump to lose its prime, which means it won’t be able to pull water through the system effectively.


6. Pump Won’t Start or Stops Randomly

If your pump refuses to start or cuts out during operation, there could be a variety of issues at play. Sometimes, it’s a simple electrical problem, but it could also be something more serious, like motor failure or overheating. A pump that doesn’t run consistently is a clear indication that something isn’t right, and it needs immediate attention.


7. Increased Energy Bills

An unexpected rise in energy bills can be an early warning that your pool pump isn’t performing as it should. When pumps lose efficiency, they work harder to maintain circulation, which leads to higher electricity usage. If you’ve noticed a sudden spike in costs, it may be time to have your equipment inspected through a professional pool maintenance and spa service to identify issues early and restore optimal performance.


8. Visible Wear and Tear

Take a close look at your pool pump. Does it look a bit worse for wear? Cracks, rust, and general wear and tear can all indicate that your pump is reaching the end of its life. Over time, exposure to the elements can take its toll on the pump housing and internal components. Regular visual inspections can help you spot these issues before they lead to complete pump failure.


9. Water Isn’t Being Filtered Properly

If you’ve noticed your pool water looking murkier than usual or debris remaining in the water despite running the filter, your pump may not be circulating water efficiently. A faulty pump can’t pull water through the filter correctly, meaning your pool’s filtration system won’t be able to do its job. If your pool’s cleanliness starts to suffer, your pump could be the root of the problem.


What Should You Do If You Spot These Issues?

If you’ve noticed one or more of these signs, it’s best not to delay. Continuing to run a malfunctioning pool pump can cause more damage to the entire pool equipment system, leading to costly repairs down the road. Instead, it’s wise to:

  • Turn off the pump to prevent further damage.
  • Contact a professional to inspect the pump and identify the problem.
  • Get it repaired or replaced promptly, depending on the severity of the issue.

Pool pumps are a critical part of maintaining the health of your swimming pool, so addressing problems early can save you time, money, and frustration.

Keeping Your Pool Pump in Good Health

Like most things, regular maintenance is the key to avoiding bigger problems. To extend the life of your pool pump and keep it running smoothly, consider the following:

  • Regularly clean the filter and remove debris from the pump basket.
  • Check for leaks around the pump regularly.
  • Monitor energy consumption to catch any inefficiencies early.
  • Schedule professional inspections at least once a year to catch any potential issues before they become big problems.

Your pool pump is an investment in your enjoyment and comfort, so don’t ignore it when it starts showing signs of trouble. Keep an eye (and ear) out for these symptoms, and act quickly to keep your pool in perfect condition.

How to Prepare Your Home for Guests: Essential Tips for a Warm Welcome

Preparing a home for guests involves creating a welcoming atmosphere that blends comfort and functionality. A few simple steps can transform any space into an inviting retreat for visitors. From decluttering shared areas to ensuring adequate seating arrangements, thoughtful preparation makes a significant difference in the guest experience.

Attention to detail is essential in this process. She should ensure that the guest bathroom is stocked with essentials like towels and toiletries, as well as providing a few cozy touches such as decorative pillows or fresh flowers in common areas. This not only enhances the aesthetic appeal of the home but also conveys hospitality.

Lastly, planning meals ahead of time can streamline the hosting experience. They might consider accommodating dietary preferences and having snacks or beverages readily available. This level of care demonstrates genuine consideration for guests, making their stay enjoyable and memorable.

Getting Your Home Guest-Ready

Preparing a home for guests involves several key steps to ensure comfort and functionality. This includes organization, cleaning, and addressing any odors while maintaining a welcoming atmosphere.

Declutter and Organize Key Spaces

To begin, it is essential to declutter areas where guests will spend time, such as the living room, dining area, and bathroom. Start by removing unnecessary items from surfaces and furniture.

Here’s a quick list of tasks to consider:

  • Clear countertops and tables of personal items.
  • Organize bookshelves and entertainment areas.
  • Create space in closets for any belongings guests may bring.

Each space should invite relaxation, so eliminate distractions. If needed, use storage bins and baskets for miscellaneous items. This approach ensures that every room appears intentional and prepared for visitors.

Thorough Cleaning of Common Areas

Next, a thorough cleaning of common spaces is vital. Focus on high-traffic areas like the kitchen, living room, and bathrooms.

Prioritize the following tasks:

  • Dust surfaces: Make sure to use microfiber cloths to catch dust effectively.
  • Vacuum carpets: This step refreshes the room and removes allergens.
  • Mop floors: A clean floor enhances the overall appearance and hygiene.

Pay special attention to guest-accessible items, like throw pillows and blankets. Using chalk paint on furniture, if it needs a refresh, can also give a new life to worn surfaces. A clean and inviting environment contributes significantly to guests’ comfort.

Addressing Odors and Ventilation

Finally, addressing odors and ventilation is crucial to ensure pleasant air quality throughout the home. Start by opening windows to allow fresh air circulation, particularly if the area feels stuffy.

Consider these tips:

  • Use air purifiers: They can filter out unwanted smells and allergens.
  • Scented candles or essential oils: These create a welcoming aroma without being overpowering.
  • Regularly check for hidden sources of odors, like trash cans or refrigerator spills.

For the best results, maintain a consistent routine to keep odors at bay, especially in preparation for holiday guests. A well-ventilated space promotes comfort and relaxation, making it ideal for both short and long-term stays.

Preparing Comfortable Guest Rooms

Creating a welcoming environment in the guest room enhances the experience for overnight guests. Specific setups and thoughtful additions contribute to comfort and convenience, ensuring a pleasant stay.

Setting Up the Guest Bedroom

The guest bedroom should be clean and inviting. Fresh linens on the bed create a sense of comfort. A neatly made bed, combined with attractive pillows, enhances the aesthetic.

An alarm clock should be easily accessible, allowing guests to manage their time effortlessly. Consider adding a bedside table or shelf for personal items. Space for luggage, such as a luggage rack, will keep the room tidy. A controllable fan or heating option gives guests control over the room temperature. Ensure adequate lighting, both natural and artificial, to cater to various preferences.

Providing Extra Blankets and Pillows

Offering extra blankets and pillows is essential for guest comfort. Some guests may prefer more support or warmth during their stay. A variety of pillows—such as firm or soft options—can cater to individual preferences. A designated storage space for these items, like a decorative basket or a closet shelf, makes them easy to access. Guests will appreciate the thoughtfulness of having options at their disposal.

Thoughtful Additions for Overnight Guests

Small touches can significantly enhance a guest’s stay. A welcome letter detailing Wi-Fi passwords, nearby attractions, and contact information adds a personal touch.

Stocking the room with light snacks or bottled water can be delightfully unexpected. A small tray of treats or a selection of teas can enhance comfort. Additionally, providing a trash can ensures cleanliness. This small detail makes it easy for guests to manage waste without cluttering the space.

Ensuring Privacy and Security

Privacy is crucial for guest comfort. Window treatments should effectively block light and provide privacy, allowing guests to feel at home.

Beyond privacy, well-chosen window coverings also help control daylight and indoor temperature, useful when guests arrive at different times or prefer a darker sleeping environment. Consider fabrics that offer the right balance between blackout and light-filtering properties, and measure windows carefully to avoid gaps that let light through. .

Professional installers can also recommend materials that dampen outside noise and improve energy efficiency. For tailored solutions and professional installation, consult a local company specializing in Custom Shades to explore the available options.

Also, check locks on doors and windows to ensure security. Guests should feel safe and secure during their stay. Consider placing a small sign outside the door to indicate a guest’s presence. This simple addition can help minimize disturbances.

Creating a Welcoming Guest Bathroom

To create a welcoming guest bathroom, focus on providing clean amenities and easy access to necessities. Attention to detail makes a significant difference in your guests’ comfort and satisfaction.

Making Necessary Renovations

The guest bathroom should function smoothly and feel fresh for every visitor. Replace worn or outdated fixtures like faucets, showerheads, and cabinet handles, and repair or update flooring, grout, or countertops to prevent damage and maintain a polished appearance.

Additionally, subtle additions such as bespoke shower screens for modern homes can elevate the space, giving it a sleek, thoughtfully designed feel. Also, painting the bathroom in a neutral color can enhance the space and create a welcoming atmosphere.

When a minor refresh reveals opportunities for a more comprehensive update, it can be helpful to consult local specialists who understand both design and practical constraints. Experienced teams can recommend moisture-resistant finishes, lighting adjustments, and layout tweaks that preserve a calm, spa-like atmosphere while improving everyday usability.

For homeowners unsure where to begin, searching for bathroom remodelers near meoften highlights companies that prioritise tranquility, durability and sensible budgets. A short consultation will usually clarify which upgrades will deliver the most comfort and longevity for guest-ready bathrooms.

And, for comfort and safety, consider adding non-slip mats, grab bars, or a small step stool for accessibility. Choosing durable, easy-to-clean materials ensures the bathroom stays attractive and guest-ready over time, reducing the need for frequent maintenance.

Stocking Clean Towels and Toiletries

Providing fresh towels can enhance the guest experience. Stock three sets of towels per guest: a bath towel, a hand towel, and a washcloth. Consider opting for cotton or bamboo towels for softness and absorbency.

Include toiletries such as shampoo, conditioner, body wash, and soap. Miniature bottles may be more appealing, allowing guests to try different products. Place these items in a decorative basket or on a shelf for an organized look. Don’t forget essentials like a toothbrush and toothpaste. A small, unbranded option can show thoughtfulness without appearing overly personal.

Beyond the basic toiletries, the visual presentation of these items plays a significant role in establishing a high-end feel. Coordinating the containers and storage solutions can instantly elevate a standard vanity into a curated space. Investing in posh bathroom products like matching soap dispensers and elegant tissue boxes ensures a cohesive aesthetic that resonates with quality.

These small but impactful details demonstrate a commitment to excellence that guests will surely notice and appreciate. This level of refinement transforms a functional bathroom into a sophisticated sanctuary.

Ensuring Accessibility and Essentials

The guest bathroom should have easy access to essential items. Ensure that a functioning plunger is visible and within reach, potentially stored in a discreet bin. Additionally, provide toilet paper in an accessible location. Stock at least two extra rolls in a cabinet or decorative holder.

For comfort, consider placing a small stool for guests who may need assistance. Also, ensure proper lighting in the bathroom. Bright, neutral lighting can enhance visibility and create a welcoming atmosphere. Include a non-slip bath mat to prevent accidents and increase comfort when stepping out of the shower.

You may also choose to enhance the space by installing Bathroom Radiators Ireland or similar heating solutions elsewhere. These radiators help maintain a warm and cosy environment, making the space more pleasant and inviting for guests.

Maintaining Guest Bath Cleanliness

A clean bathroom is crucial for a positive guest experience. Regularly clean fixtures, mirrors, and surfaces to ensure they remain spotless. Consider using natural cleaners to minimize harsh chemicals. Scheduled deep cleaning before guests arrive can help maintain the space effectively. After each guest, perform light cleaning tasks, such as wiping down surfaces and restocking supplies.

Additionally, check for any unpleasant odors and ensure proper ventilation. Implementing these practices keeps the guest bath inviting and pleasant. A well-maintained atmosphere reflects care and consideration for guests.


How to Sell Your Home for Cash: A Simple Guide to Quick Transactions

Selling your home can often feel daunting, but exploring the option to sell for cash offers a straightforward solution. Cash buyers can streamline the process, allowing you to avoid traditional hurdles such as lengthy mortgage approvals and inspections. This approach not only speeds up the transaction but also often results in a quicker closing, making it an attractive choice for you if you’re looking for a fast and hassle-free sale. With fewer steps involved, you can move on to your next chapter with ease and confidence.

When you opt for a cash offer, you can expect a simplified negotiation process. Cash buyers are typically investors or companies looking to purchase properties quickly, which often leads to offers that are less contingent on financing and more direct. Understanding the dynamics of this process allows you to make informed decisions throughout your selling journey, helping you navigate the process with confidence and clarity.

Ultimately, knowing how to effectively Sell your home for cash can maximize potential profits and minimize selling timelines. By focusing on creating an appealing property presentation and promoting the home to the right audience, you can unlock the advantages of a cash sale while minimizing the stress often associated with traditional home-selling methods.

Understanding Cash Offers

Cash offers are a popular option for homeowners looking to sell quickly and efficiently. A cash offer means that a buyer can purchase the home without needing mortgage approval, which can streamline the transaction.

What Is a Cash Offer

A cash offer refers to a proposal made by a buyer to purchase a property outright, using cash rather than financing through a mortgage. Cash buyers can include individuals, investors, or companies known as iBuyers.

Since there’s no need for bank approval, cash offers can lead to faster closings. This type of offer is advantageous in competitive markets where sellers may prefer quick, uncomplicated sales. Cash offers can also sometimes be lower than market value due to the reduced risk for the buyer.

Benefits of Selling for Cash

Selling a house for cash presents several benefits. First, completing a tampa home sale for cash often results in a faster sale. The absence of financing approvals means fewer delays during the transaction process. Next, sellers can save money on closing costs. Without mortgage-related fees, the overall expense of the sale decreases.

Cash offers typically come with fewer contingencies, resulting in a more straightforward negotiation process. Additionally, many Cash Home Buyers tend to buy houses in their current condition; this can mean that sellers don’t have to go through the hassles of getting maintenance or repairs done on their property.

Another advantage is the reduced risk of the deal falling through. Since cash buyers do not rely on financing, the probability of a sale collapsing due to loan approval issues is minimized.

How Cash Home Sales Work

When engaging in cash home sales, process understanding is vital. First, a home seller typically receives a cash offer after negotiations with buyers or investors. Once accepted, the seller and buyer proceed to draft a purchase agreement. This contract outlines terms, including price and closing dates.

Afterward, an inspection may occur, although it’s not always required. Cash buyers may purchase the home in its current condition, allowing sellers to avoid costly repairs. Closing occurs once all terms are satisfied. This stage often involves meeting at a title company, where the cash payment is transferred, and ownership is recorded. The entire transaction can close within a week, providing sellers with prompt access to funds.

Preparation and Valuation

Preparing a home for sale involves understanding its worth and ensuring it appeals to prospective buyers. This includes conducting a thorough valuation and making any necessary repairs or improvements.

Assessing Your Home’s Worth

To determine a home’s value, owners should start with a comparative market analysis (CMA). This involves researching similar properties in the neighborhood that have sold recently. Key factors to consider include:

  • Square footage
  • Location
  • Amenities
  • Condition

Establishing a fair market value helps set a competitive price. If no repairs are needed, buyers may pay a price closer to the property’s full market value. The 70% rule is also relevant for cash buyers; they often aim to pay about 70% of the market value minus repair costs. This can guide sellers in their pricing strategy.

Important Repairs and Improvements

Before listing a home, addressing necessary repairs can boost its market appeal. Common areas to focus on include:

  • Roofing and plumbing issues
  • Electrical system updates
  • Cosmetic improvements such as paint or flooring

Deciding what repairs to prioritize depends on their return on investment. Basic maintenance can increase buyer interest without over-investing. Sellers should also be cautious of over-improving, as this can negate profit margins. A cost-benefit analysis can aid in determining which repairs are worthwhile.

Staging Your Home for a Quick Sale

Staging enhances a home’s visual appeal, making it easier for buyers to envision their lives in the space. Effective staging tips include:

  • Decluttering to create an open feeling
  • Neutralizing decor to appeal to a wider audience
  • Highlighting key features with furniture placement

Professional staging can be beneficial, but simple DIY changes often work well. Emphasizing natural light and creating an inviting atmosphere can significantly impact buyers’ perceptions. A well-staged home can sell faster and closer to the asking price, making the preparation period crucial.

Navigating the Selling Process

Selling a home for cash involves several important steps. Knowing the right cash buyer and understanding the closing process can significantly impact the experience. It is essential to avoid common pitfalls along the way.

Choosing the Right Cash Buyer

Selecting an appropriate cash buyer is crucial. Cash buyers can include individual investors, house flippers, real estate companies, or investment groups. Each has different motivations and offers.

Key Factors to Consider:

  • Reputation: Look for buyers with positive reviews and a track record of successful transactions.
  • Cash Availability: Confirm they have sufficient funds to complete the purchase without financing.
  • Inspection Contingency: Ensure buyers are willing to bypass or limit inspection requests to streamline the process.

Connecting with multiple cash buyers can provide options and leverage in negotiations. He or she should also be wary of buyers who offer significantly lower prices without justification.

Understanding the Closing Process

The closing process for a cash sale typically involves fewer complexities than traditional sales. Once both parties agree on the price, the following steps occur:

  • Escrow Setup: A neutral escrow company manages the transaction, holding funds until closing.
  • Title Search: Conducted to ensure the seller has a clear title for the property, free of liens.
  • Closing Documents: Both parties must review and sign necessary documents, including the purchase agreement and any disclosures.

The closing date is typically agreed upon during negotiations. He or she should aim for a closing timeline that suits their needs while allowing adequate time for the buyer to conduct due diligence.

Avoiding Common Pitfalls

Awareness of potential pitfalls can lead to a smoother transaction. Sellers should take precautions to avoid issues like:

  • Underestimating Closing Costs: These can include title insurance, transfer taxes, and escrow fees. Knowing these costs in advance helps in budgeting.
  • Neglecting Repairs or Appraisals: Some cash buyers may skip inspections, but neglecting necessary repairs may reduce the sale price or cause complications later.
  • Forgetting to Clear Title issues: Issues related to the property title can delay or derail the closing process. Engaging a title company early can help address any concerns.

By actively managing these aspects, sellers can facilitate a more successful cash sale.

Finalizing the Deal

Successfully finalizing a cash sale involves a few critical steps to ensure a smooth transaction. Key actions include conducting a title search, verifying proof of funds, and signing the final documents. Each of these steps is essential for both the seller’s peace of mind and the efficiency of the closing process.

Completing a Title Search

A title search is crucial when finalizing a home sale. This process verifies ownership and checks for any liens or claims against the property. It is essential to ensure that there are no legal issues that could hinder the transaction.

Sellers typically engage a title company or real estate attorney to conduct this search. They will provide a report detailing any outstanding obligations related to the property. Addressing these issues may be necessary before proceeding to close.

Ensuring a clear title can prevent future disputes and ensure a smooth transfer of ownership to the buyer. This step helps sellers protect their interests and can speed up the process if any issues arise early.

Verifying Proof of Funds

Verification of proof of funds is a vital part of finalizing a cash sale. Buyers must demonstrate their financial capability to complete the purchase without financing. This verification helps sellers avoid delays by confirming the buyer’s ability to perform.

Typically, proof can be shown through a bank statement or a letter from a financial institution. Sellers should request this documentation early in the negotiation process to avoid any potential inconvenience.

A cash buyer often has a competitive edge, particularly in a seller’s market. Establishing proof of funds adds confidence and reassures the seller that the buyer can complete the transaction without complications.

Signing the Final Documents

Once the title search and proof of funds are confirmed, it’s time for the final document signing. This process typically includes the purchase agreement, any disclosures, and the deed transfer. A notary may be present to verify identities and signatures during this step.

Sellers should carefully review all documents to ensure accuracy before signing. Attention to detail is necessary to avoid errors that could cause delays. Once signed, copies of the documents should be distributed to all parties involved.

The final step is often the transfer of funds, concluding the sale. A cash sale allows for faster closing, typically within a matter of days, providing both parties with a simplified and efficient transaction experience.


The Benefits of Regular Handyman Services for Property Management

Managing a property can sometimes feel like juggling-there are always multiple things up in the air. Whether you’re handling a cozy rental home or a bustling commercial space, keeping everything in perfect working order is a never-ending task. Enter the handyman! These versatile professionals can tackle everything from minor repairs to major fixes, ensuring that your property remains in top-notch condition.

Why a Handyman is Your Go-To Person

Think of a handyman in Thornton, CO as your property’s personal superhero. They have a wide range of skills that can cover almost any repair or maintenance job you can think of. Need a light fixture replaced? They’ve got it. A leaky faucet? No problem. Painting a wall? Easy. This versatility is incredibly valuable, especially when unexpected issues pop up-because, let’s be real, they always do!

Saving Time and Money

One of the biggest perks of having a handyman on speed dial is the cost savings. Instead of hiring different specialists for various small tasks, a handyman can handle multiple issues in one go. This not only saves you money but also frees up your time. Plus, regular maintenance by a handyman can prevent minor issues from becoming major, expensive headaches down the line.

  • Quick Fixes – Tackling small repairs before they escalate.
  • Preventative Care – Regular check-ups to keep everything in tip-top shape.
  • One-Stop Shop – A single visit can cover multiple minor repairs.

Titan Air

Boosting Property Value

A well-maintained property not only looks good but also retains or even increases in value. Regular handyman services ensure that everything is in working order, from the plumbing and electrical systems to the aesthetics like paint and landscaping. By reaching out to a reliable plumber, an electrician North Orlando, FL (or elsewhere), and other service providers, you can ensure that the functioning as well the appearance of the property is top notch. This can be particularly important if you’re looking to sell or rent out your property. Potential buyers and tenants are more likely to be attracted to a place that’s been well cared for.

Keeping Tenants Happy

If you manage rental properties, you know that tenant satisfaction is crucial. Happy tenants are more likely to renew their leases, and they might even recommend your property to others. Quick and efficient responses to maintenance requests can make a huge difference. A handyman can handle common tenant issues like broken appliances, minor plumbing problems, and general wear and tear, keeping everyone content.

Common Tenant Issues a Handyman Can Solve

  1. Leaky Faucets – A small drip can be annoying and waste water.
  2. Faulty Light Fixtures – Nobody likes living in the dark.
  3. Squeaky Doors – A little lubrication can go a long way.

Convenience at Your Fingertips

There’s a comforting sense of security in knowing that you have a reliable handyman to call when something goes wrong. Whether it’s an emergency repair or a scheduled maintenance check, having a go-to person simplifies your life. This is especially helpful for those managing multiple properties or busy commercial spaces where downtime can be costly. It is important to keep in mind that whilst handymen are great for every day needs, the big jobs will have to go to the professionals who do these full time. For instance, if your commercial roof is showing signs of wear and tear then you will want to protect your business investment from weather damage with expert roofers.

Long-Term Protection for Your Investment

Your property is a significant investment, and regular maintenance is key to protecting that investment. By keeping everything in good repair, you can avoid costly renovations or replacements in the future. A well-maintained property is also more attractive to tenants and buyers, making it easier to keep occupancy rates high or sell at a good price.

Setting Up a Maintenance Schedule

Creating a maintenance schedule with your handyman can be a game-changer. This schedule can include everything from regular inspections to seasonal maintenance tasks. Not only does this ensure that your property stays in great shape, but it also helps you budget for repairs and upgrades throughout the year. Keep in mind, that in some cases when it comes to commercial services, your handyman may not be the best choice. For instance, running a restaurant, you can call in your handyman for the odd job, but something larger like a HVAC system repair, this will need to go to the experts. You can visit site Green Tex Cooler Solutions to learn more about this process.

Sample Maintenance Schedule

  • Monthly Tasks – Checking smoke detectors, testing alarms, and inspecting plumbing.
  • Seasonal Tasks – Cleaning gutters, servicing HVAC systems, and inspecting the roof.
  • Annual Tasks – Deep cleaning carpets, painting touch-ups, and major appliance check-ups.

Going Green: Eco-Friendly Upgrades

A handyman can also help make your property more eco-friendly. From installing energy-efficient lighting to fixing leaks that waste water, these small changes can have a big impact on both the environment and your utility bills. It’s a win-win situation that also appeals to environmentally conscious tenants or buyers.

Building a Relationship of Trust

Over time, a good handyman becomes more than just a service provider; they become a trusted partner in maintaining your property. They get to know the ins and outs of your space and can offer valuable advice on improvements or potential issues to watch out for. This kind of relationship can be incredibly valuable, providing peace of mind and ensuring that your property remains in excellent condition.

The Bottom Line

Regular handyman services are an invaluable resource for any property manager. They offer a cost-effective, convenient way to keep your property in excellent condition, which can boost property value, keep tenants happy, and protect your investment. Whether it’s fixing a leaky faucet or tackling a more significant repair, having a skilled handyman on your team is a smart move that pays off in the long run.

Top Cornice and Coving Trends for Modern Homes

Modern homes are all about blending style with functionality, and few elements achieve this balance as effortlessly as thoughtful architectural detailing. Cornices and coving are often overlooked, yet they have the power to subtly transform a space, adding depth, refinement, and a quiet sense of sophistication without overwhelming the overall design.

Modern homes, like those found in developments such as charlestown ma real estate or similar contemporary communities, tend to reflect this design philosophy. The emphasis is on clean lines, open layouts, and a careful balance between practicality and visual appeal. In these spaces, nothing feels accidental. From ceiling height and lighting placement to the smallest finishing touches, every detail is chosen with intention to create a cohesive and well-resolved interior.

Let’s explore the top cornice and coving trends for modern homes.


The Return of Minimalism

Minimalism has made a significant comeback in recent years. Clean lines, simple designs, and a less-is-more philosophy dominate the scene. For cornices and coving, this translates into sleek, unadorned mouldings that seamlessly blend into the ceiling and walls. The focus is on creating a seamless transition that enhances the architectural integrity of the space without overwhelming it. Check out cornice and coving by Keaneys for some ideas, inspiration, and a company who can bring your vision to life.

Key Features:

  • Straight Lines – No intricate patterns, just pure, clean edges.
  • Subtle Profiles – Slim, understated mouldings that add depth without drawing too much attention.
  • Neutral Colours – Whites, off-whites, and subtle greys are popular, keeping in line with the minimalist aesthetic.

Bold Statements with Geometric Patterns

For those who love to make a statement, geometric patterns are the way to go. These designs can add a contemporary twist to any room, creating visual interest and a unique focal point. Geometric coving and cornices often feature repeating shapes like hexagons, triangles, and squares.

Why Geometric Patterns Work:

  • Modern Appeal – Adds a trendy, up-to-date look.
  • Versatility – Works with various decor styles, from industrial to Scandinavian.
  • Dynamic Visuals – Creates a striking visual effect that can enhance both small and large spaces.

Embracing the Classic with a Twist

Traditional designs never really go out of style; they just evolve. Modern homes are now incorporating classic cornice and coving designs but with a contemporary twist. Think ornate patterns but with a slightly modern edge – maybe a simpler palette or a slightly altered shape.

Classic with a Twist Elements:

  • Updated Motifs – Traditional floral or acanthus leaf designs with a modern interpretation.
  • Mixing Materials – Combining traditional plaster with modern materials like wood or metal.
  • Colour Play – Using bold colours on classic designs to create a striking contrast.

Eco-Friendly and Sustainable Choices

Sustainability is a growing trend in home design, and cornices and coving are no exception. Homeowners are increasingly opting for eco-friendly materials that are both stylish and environmentally responsible.

Sustainable Materials Include:

  • Recycled Plaster – Made from reclaimed materials, reducing the environmental footprint.
  • Bamboo – A fast-growing, renewable resource that’s perfect for coving.
  • Reclaimed Wood – Adds character and a story to your home’s architectural details.

Integrated Lighting

Combining lighting with cornices and coving is a brilliant way to add both style and functionality to your space. Integrated lighting can create a soft, ambient glow that enhances the room’s atmosphere. It’s perfect for creating a cosy, inviting feel.

Benefits of Integrated Lighting:

  • Enhanced Ambience – Soft lighting that creates a warm, inviting atmosphere.
  • Space-Saving – Eliminates the need for additional light fixtures.
  • Highlighting Features – Perfect for highlighting architectural features or artwork.

Customisation and Personalisation

Every home is unique, and more homeowners are looking to customise their cornices and coving to reflect their personal style. Custom designs allow for a unique touch that standard options can’t provide. Whether it’s a unique pattern, a specific material, or a custom colour, personalisation is key.

Customisation Ideas:

  • Bespoke Designs – Create your unique pattern or motif.
  • Tailored Colours – Match your coving and cornices to your interior palette.
  • Unique Materials – Mix different materials to create a one-of-a-kind look.

Combining Old and New

One of the most exciting trends is blending old and new elements. This trend allows for a unique aesthetic that combines the charm of traditional design with the clean lines of modern style. It’s about creating a dialogue between the past and the present.

How to Combine Old and New:

  • Juxtaposition – Place modern coving in a room with antique furniture.
  • Colour Contrast – Use traditional cornices in a modern colour.
  • Material Mix – Combine classic plaster with contemporary materials like glass or metal.

Incorporating Technology

In our digital age, even architectural details can benefit from technology. Smart home integration is extending to cornices and coving, with features like built-in speakers and smart lighting systems.

Tech-Savvy Features:

  • Smart Lighting – Control the mood of your room with your smartphone.
  • Built-In Speakers – Perfect for seamless audio experiences.
  • Hidden Wiring – Keep your tech hidden for a clean, uncluttered look.

Finishing Touches: Paint and Texture

Finally, the finishing touches can make all the difference. Textured finishes and unique paint techniques are trending, adding depth and interest to your cornices and coving. From metallic finishes to hand-painted designs, the possibilities are endless.

Popular Finishing Techniques:

  • Metallic Paints – Adds a touch of glamour and sophistication.
  • Textured Finishes – Creates a tactile, visually interesting surface.
  • Hand-Painted Designs – Offers a personalised, artisanal touch.

Bringing It All Together

Choosing the right cornice and coving for your modern home is about understanding your style and the overall feel you want to achieve. Whether you prefer minimalist designs, bold geometric patterns, or a blend of classic and modern, there’s something out there for everyone. Don’t be afraid to experiment and make your home uniquely yours.

Reinvent Your Home: The Benefits of Remodeling Your Basement

Have you ever wandered into your basement and thought, “This space could be so much more”? If so, you’re not alone. Basements are often the most underutilized areas in our homes, relegated to storage for old furniture, boxes of holiday decorations, and the occasional spider. But what if we told you that your basement holds the key to a plethora of opportunities? Remodeling your basement is a fantastic way to reinvent your home, add value, and create a space that everyone in the family can enjoy. Let’s dive into the benefits of basement remodeling Denver.

Unleash Hidden Potential

More Living Space

One of the most significant benefits of remodeling your basement is the addition of extra living space. Whether your family is growing, you need a home office, or you simply want more room to entertain guests, a finished basement can provide the perfect solution. Imagine having a cozy family room, a stylish game area, or even a private guest suite right below your feet. The possibilities are endless.

Increase Home Value

A well-finished basement can significantly boost the value of your home. Potential buyers often see a finished basement as a bonus, offering more living space without the need for an extension. This can be a major selling point if you ever decide to put your house on the market. In fact, according to some real estate experts, you can expect to recoup around 70% of your investment in a basement remodel when you sell your home.

Enhance Functionality

Remodeling your basement can also make your home more functional. From creating dedicated spaces for laundry, storage, or hobbies to installing a second bathroom or kitchenette, you can design the basement to meet your specific needs.

stylish laundry room cabinets

Personalize Your Space


Customization Galore

One of the best parts about remodeling your basement is the ability to customize it to your heart’s content. Unlike other rooms in your house that might already have designated purposes, the basement is a blank canvas. Do you dream of a home theater? Or perhaps a fitness center to keep up with your workout routine? Maybe a craft room where you can unleash your creativity? The basement can be transformed into whatever your heart desires.

Create a Personal Sanctuary

In our busy lives, having a place to unwind is essential. A remodeled basement can serve as your personal sanctuary, away from the hustle and bustle of the main living areas. Think about a serene yoga studio, a tranquil reading nook, or even a music room where you can jam without disturbing the rest of the household.

Improve Energy Efficiency

Better Insulation

Basements are notorious for being chilly and damp. However, during a remodel, you can address these issues by installing proper insulation. This not only makes the basement more comfortable but can also improve the overall energy efficiency of your home.

Modern HVAC Systems

Updating the HVAC system during a basement remodel can also contribute to better energy efficiency. Modern systems are designed to be more energy-efficient and can be integrated seamlessly into your home, providing consistent heating and cooling throughout all levels.

finished basement

Practical Tips for Remodeling Your Basement


Plan Ahead

Before you start knocking down walls and picking out paint colors, take the time to plan your remodel thoroughly. Consider how you want to use the space, what features are most important to you, and your budget. A well-thought-out plan can help you avoid costly mistakes and ensure that the result meets your expectations.

Hire Professionals

While DIY projects can be fun and cost-effective, remodeling a basement is a major undertaking that often requires professional expertise. From plumbing and electrical work to structural modifications, hiring reputable local basement contractors typically ensures the job is done safely and up to code. In addition to these benefits, a well-executed basement remodel can provide additional living space, increase home value, and enhance overall functionality.

Think About Lighting

Basements typically have limited natural light, so incorporating adequate lighting is crucial. A combination of overhead lights, wall sconces, and floor lamps can brighten up the space and make it feel more inviting. Consider using light colors for walls and ceilings to enhance the brightness even further.

Address Moisture Issues

Basements are prone to moisture problems, which can lead to mold and mildew if not properly addressed. Before starting your remodel, check for any signs of water damage and take steps to waterproof the area. Installing a sump pump, sealing cracks, and using moisture-resistant materials can help keep your basement dry and healthy.

Keep Pests Out

An often-overlooked aspect of basement remodeling is pest prevention. Dark, damp areas can attract unwanted visitors like rodents and insects, which can cause damage and create an unhealthy environment. Before finishing your space, inspect for any cracks or gaps where pests could enter and seal them properly. If cockroaches are a concern, especially waterbugs, consider a Local waterbug cockroach treatment to prevent infestations and keep your basement pest-free.

Ideas for Your Basement Remodel

Home Office

In the era of remote work, having a dedicated home office is a must. A basement office can offer the privacy and quiet you need to stay productive.

Guest Suite

Welcome guests with a cozy and comfortable suite. A bedroom, bathroom, and small kitchenette can make them feel right at home.

Fitness Center

Bring the gym to you by setting up a fitness center in your basement. With workout equipment, mats, and mirrors, you can stay fit without leaving the house.

Conclusion

So, roll up your sleeves and get ready to reinvent your home from the ground up!

Designing with Light: Enhancing Your Home

Creating a warm, inviting atmosphere in your home involves more than just picking out the right furniture or paint colors. One often overlooked element that can transform the ambiance of any space is lighting.


Understanding the Importance of Lighting

Proper lighting can:

  • Set the Mood: Different types of lighting can evoke various emotions and create different atmospheres within a space.
  • Highlight Features: Well-placed lighting can draw attention to architectural details, artwork, or other focal points in a room.
  • Enhance Functionality: Effective lighting design ensures that each area of your home is adequately illuminated for its intended use.
  • Boost Aesthetic Appeal: Thoughtfully chosen lighting fixtures can add style and character to your home decor.

Maximizing Natural Light

Natural light is a valuable asset in any home, providing warmth and vitality while reducing the need for artificial lighting during the day. Here’s how you can make the most of natural light:


1. Optimize Window Placement:

Position furniture and other obstacles away from windows to allow light to penetrate freely into the room.


2. Choose Light-Colored Window Treatments:

Opt for sheer curtains or blinds that allow sunlight to filter through while still providing privacy.


3. Install Skylights or Sun Tunnels:

These features can bring natural light into areas of your home that may be lacking in windows, such as bathrooms or hallways.


4. Consider a Louvered Roof:

A louvered roof is a versatile outdoor structure that can be adjusted to control the amount of sunlight entering your home. With adjustable louvers, you can regulate sunlight and airflow, creating the perfect balance of shade and brightness.


Layering Lighting for Ambiance

In addition to natural light, it’s essential to incorporate artificial lighting sources to create depth and ambiance within your home. Here are some layering techniques to consider:


1. Ambient Lighting:

This is the primary source of light in a room and should provide overall illumination. Options include recessed ceiling lights, track lighting, or pendant fixtures.


2. Task Lighting:

Task lighting is focused on specific areas where activities such as reading, cooking, or working take place. Examples include desk lamps, under-cabinet lighting in the kitchen, or vanity lights in the bathroom.


3. Accent Lighting:

Accent lighting highlights architectural features, artwork, or decorative elements. This can be achieved with track lighting, wall sconces, or picture lights.


4. Mood Lighting:

Mood lighting adds ambiance and can be adjusted to suit different occasions or moods. Dimmer switches, candles, or decorative lamps with soft, diffused light are excellent options.


Choosing the Right Fixtures

The type of lighting fixtures you choose can make a significant difference in the overall look and feel of your home. Consider the following factors when selecting fixtures:

  • Style: Choose fixtures that complement your home’s decor and architectural style.
  • Size: Ensure that fixtures are appropriately sized for the space they will occupy.
  • Brightness: Select bulbs with the appropriate wattage for the desired level of illumination.
  • Energy Efficiency: Opt for LED or CFL bulbs to save energy and reduce utility costs.

Incorporating Smart Lighting Technology

Harnessing the power of technology can enhance the functionality and convenience of your lighting system. Smart lighting options allow you to:

  • Control Lighting Remotely: Adjust brightness, color, and timing using smartphone apps or voice commands.
  • Set Customized Scenes: Create preset lighting scenes for different activities or times of day.
  • Monitor Energy Usage: Track energy consumption and optimize lighting settings to save money and reduce environmental impact.

Conclusion

By embracing natural light, layering different lighting elements, carefully selecting fixtures, and embracing innovative smart technology, you can craft a lighting setup that not only enhances the atmosphere but also resonates with your individual lifestyle and preferences.


Frequently Asked Questions (FAQ)

What are some common mistakes to avoid when designing with light? Steering clear of some typical pitfalls can make all the difference in your lighting design. Be sure not to overlook the beauty of natural light, avoid harsh or insufficient lighting options, and always consider the specific activities and needs of each room. Striking the right balance between practicality and atmosphere is key, all while keeping energy efficiency and personal taste in mind.

How can I create a cohesive lighting design throughout my home? Crafting a unified lighting design is akin to painting a masterpiece – it requires careful consideration and attention to detail. Take into account the flow and function of your space, ensuring a harmonious relationship between different areas. Aim for a mix of ambient, task, accent, and mood lighting, maintaining consistency in style and color temperature throughout. Don’t be afraid to experiment with different techniques and fixtures to achieve the desired ambiance in every corner of your home.

Scroll to Top